The Timeplan

9 weeks into the first semester and I’m already not following the timetable I had originally planned within my proposal for the year.


original
Original Timetable (Before I had switched the Wizard of Oz project with the L.W.W project in Semester 2)

I believe this is due to multiple confusing factors from the beginning till now, one of them being that I have chosen to read all of the books. After finishing The Lion the Witch and the Wardrobe, and realising how long it had taken, (which wasn’t exactly long, but longer than I had initially expected) I decided to start reading ‘Howls Moving Castle’ for the House of Illustration competition, then after I finished that, I started and am currently reading Norwegian Wood, but I still have to read Wonder, both books being apart of the Penguin competition.

Another factor to my confusion is that my tutor has been wanting specific things done by a certain point, such as a statement of intents or the research for the projects, so instead of working at my own pace, following my set timetable, I have been trying to complete them all at once which has not done me very well.

So, with these factors, I feel I have just gotten confused in which project I should be working on, so probably have not done as much as I could have if I were specifically concentrating on one.

SO, with 9 weeks left, (8 now that I am posting this) I am going to replan my timetable so that I can properly concentrate on one project at a time.

newtime
New and Improved Timetable, Starting 12/11/18

Inktober – I have spent wayyyy too long on this project, so this week (and possibly a bit of next) I am going to try round off this project, getting the zines printed, making sure that everything is fully annotated, making an evaluation, and just getting this project out of the way so that I can concentrate on the others properly.

The Lion, the Witch and the Wardrobe – I know I need time to work within the college, using the facilities available, so I believe I am going to work on this project next week, then break off for a month or so to do the competitions, then during the last 2 weeks before deadline, I will print my final designs and round off the project

House of Illustration – 3 (now 2) weeks from now, I plan to focus on my House of Illustration project, creating a book cover and set of illustrations for the book ‘Howls Moving Castle, over a 3-week time period. This time will be spent on researching, sketching, experimenting, then producing the final designs.

Penguin Student Design Awards – 6 (now 5) weeks from now, I will start working on yet another competition, which again I plan to do within a 3-week timeframe. Again, I will be working in a similar routine/method to the previous project, researching, sketching, experimenting, then producing the final designs, however, this time I will be doing this process with two books, one being Wonder by R. J. Palacio, and Norweigan Wood by Haruki Murakami.

I hope that with this new timetable, that there will be less confusion, I will be able to focus on one project at a time, and inevitably, I will be able to get more work done.

Screen Printing Class

When going into this class, I had did not have high hopes for it as the previous time that I had learnt the process, the outcomes did not come out the best, and the actual screen would fall apart after a couple of prints. However, in this class, we learnt a new process for making our screens, which did work a lot quicker and easier, and the screen actually lasted longer and gave better quality prints.

In the previous year, with our illustrations, we had to make them digitally and set them up within illustrator so that the image would be formed up of paths, but would be together in a compound shape. This was so that the design could run through the vinyl cutter, and it would recognise the paths and cut where needed. Once printed, you would then have to sit and weed out the sections of your design that you would want to be printed. I did actually enjoy this process, however, for time purposes, it wasn’t the best. When you had all the colour sections removed, you would then have to apply the vinyl to your screen by hand, which would often take two people to do as the screen was so big, and you would have to be meticulous with the process, making sure that there would be no air bubbles between the screen and vinyl, as this would potentially lead to your design bleeding when inked. Once the process of making your screen was complete, you would then place the screen facing down onto your paper but would have to use heavy weights or another person to hold the screen in place so that it wouldn’t move and potentially resulting in a bleed or smudge of your design. By working with another person, this also made it more awkward when pulling the ink down over the design, as it wasn’t just a smooth pull down, you would have to move around the arms that were holding your screen down. After all this effort, the screen would only last a couple of prints, at least in my own experience, as the ink would loosen the adhesive of the vinyl, which lead to some of my details falling off. Shown below are my results from this experience, which I hope show why I did not enjoy this experience and was not looking forward to trying it again.

HOWEVER, when beginning and learning this new process, it was SO much easier! When initially making the design, although I still had to make a monochrome design, as shown in my previous blog post, click here to see, I did not have to faff around with illustrator files, paths and compound shapes, I just needed to save my design as an A4 Jpeg.

When it came to creating the screen, we were all given frames which would be our own for the year. This would mean that we could repeat this process whenever we needed, as in previous years they have had a limited amount of screens, which could get damaged or take a while to dry after cleaning, so this would eliminate those issues, and if ours went missing, it would be of our own doing. With this frame, we were given a sheet of instructions to follow. Starting with it positioned so that there were two holes on the right and one in the top left corner, using double-sided tape, you’d then line all four sides. We were then given a sheet of mesh, which we stuck down onto the tape, making sure it was the rougher side facing upwards. This sheet acts as our screen and would be replaced from print to print. Using green tape, we then lined each side of the fame once again. This would ensure that the screen would not move during the process. With a craft knife and a cutting matt, we then carefully cut out the holes, the two on the right and one in the top left corner. Our screen was then ready for the design to be printed onto.

Using a new machine which burns the design onto the mesh, you would slot your frame into it, using the holes, then it would feed through, burning your design into the screen as it goes. I believe you do need to use a specific program for this to work, but it seemed simple enough to upload your Jpeg image and have it work. A couple of the other students did have issues with this process as they found the printer would glitch halfway through, but we discovered that this was due to the screen not being stable through the feeding process, as it would sometimes fall when coming out on the opposite side.

Below are images from the process of creating the screen, apologies if some are unclear as to what is going on within them.


When it had come to printing the designs, as the frame and screen were a lot thinner and lighter than the ones used in the previous process, it was no longer a two-man job to hold it in place, a couple of weights would suffice, meaning that when squeegeeing the ink down the screen, the process was a lot smoother.

The printing medium we had used was one part paint in the colour you wanted, I chose black as it fits with the style of work that I wish to create for the project, then two parts of acrylic medium. I believe the medium helped thin down the paint, making it a lot easier to transfer through the screen.  With a squeegee, you then put some of this medium in a line at the top of the screen, which should be faced downward on your page, then at a 45̊ angle, you then pull it down across your design. If you put too much medium, the print may bleed, but if you put too less, you may miss some details of your design. After a few runs, it is suggested that you wash your screen so that it does not get clogged, but once it is dry, you can go back to printing again.

This was unlike the previous process because if you were done with that screen, you would have to remove all of the vinyl, wash the screen, then you would not be able to print with the design again unless you went through the whole process of making your screen from vinyl once again.

Below are images of my results from this class, which as you can see I did experience a few learning curbs, using too much ink, or using the screen whilst it was still wet after cleaning, but I did get a few nice prints, and overall this class did give me a better perspective on the technique and process, and I do believe I will be using it again in the future. Potentially for final prints, but also for creating sellable products, as I believe it could be used to make good quality limited edition prints, bags, t-shirts, etc.

All images are my own unless stated otherwise.

The Lion, the Witch and the Wardrobe – Review

As a personal project, I wanted to illustrate the story of ‘The Lion, the Witch and the Wardrobe’ by C. S. Lewis, as on screen it was a childhood favourite, and I always had the chronicles of Narnia in my cupboard but never actually read it (or don’t recall ever reading it, it did seem to be bigger when I was little so probably scared me). But as I had never read it, I wanted to see if there were any differences from book to the screen adaptation like there is in many book adaptations nowadays, and I planned to illustrate the original story as opposed to the imagery I already knew from the movies or the very dated BBC version.

When actually reading the book, I was surprised but not in a good way. The story is very brief in its descriptions and I was disappointed in the lack of detail that was given, because since I didn’t want to work with the imagery I already knew, I was leaning on the details to give me a better vision of the scenery or characters so that I could interpret them in my own way.

In this case, for once, I had felt the movie and even the BBC program adaptation of the story was more detailed than the book and did give better visuals.

It was, however, an easy read, so would be better suited to a younger reader, so I could possibly be overanalysing it due to my age and level of reading.

When I think about other adventure/fantasy books that I have read, I like to compare this book against J. R. R. Tolkiens Lord of the Ring series, as where C. S. Lewis has next to no detail, on the other side of the spectrum Tolkien almost goes too much into detail in his descriptions, to the point where I did get a bit bored when reading. In C. S. Lewis’s case, it was an easy read but I feel the visuals it gave were basic and it almost seemed too fast-paced in a way.

With this book, I will try to take as much from the descriptions as possible, but I will probably illustrate more from my imagination or create a mood board to help me flesh out the visuals to my ideas.

In conclusion, ‘The Lion, the Witch and the Wardrobe’ is probably better suited to a younger reader, but I still feel it definitely lacks in detail and the movie, for once, was better than the book.

6 Techniques I Used To Create Monochrome Illustrations Digitally

This tutorial had originally sprouted from my tutor telling everyone to create a monochrome illustration, which would then be used for screenprinting on Friday. I will post a tutorial/guide/tips I learnt from that lesson, after my class on Friday. From my previous knowledge of screenprinting, I believe you have to create a black and white image that will act almost as a stencil, so that is what I have tried to keep in mind throughout this experimentation.

wardrobe.5
Original Digital Painting of the Wardrobe – No added filters.

Starting with a piece I had digitally painted (tutorial on digital painting possibly coming soon?), which is of the wardrobe for my ‘Lion, the Witch and the Wardrobe’ project. With all the colour layers, I had grouped them all together then duplicated the group, I then flattened the second group. This was so that if anything went wrong during this experimentation process/phase, I would still have my original layers within the first group. I decided to keep the linework separate from the painting as I wanted my linework to remain clean and readable, I did not want it to possibly become distorted with one of the effects I’m about to show you.

For these techniques, you will be playing around with the flattened layer of colour, using filters from the ‘pixelate’ section within Photoshop. If you do not like any of the effects on your work, it is easy to undo by just going to edit and undo.

1.Colour Halftone

With this technique, it takes your image and pixelates it into rows of dots, which range from sizes, getting bigger in the deeper tones, and smaller in the lighter. You are able to change the size of these dots, making them finer or bigger, in the controls box that pops up before the change is made.

I personally liked this filter with a bigger scale of dots, as I feel when they are smaller, from a distance, the piece looks more square in the pattern, whereas when they’re bigger, it almost gives a pop art/comic type of effect.

test3 colourhalftone

2.Mezzotint – Dots

For the mezzotint filter, there are three types in which you can try, one being dots, another being lines and another being strokes. Within these options, you can then chose whether you want the effect to be bolder or finer, etc.

As an example, with the piece below, I have used fine dots, and to me, it has made my design look more fuzzy, specifically in the darker areas, but you can see that it has almost a similar effect as adding noise.

test2 finedot

3.Mezzotint -Lines

This is one of the other mezzotint filters, the short lines. As you can see, it builds up the image using lines, they are closer together in the darker areas and further apart in the lighter, forming the contrast of the tonal piece

I don’t really enjoy the outcome of this filter as I feel it had made my piece look more patchy as opposed to blended. I feel I just prefer a neater approach with these filters, whereas this design looks more scratchy in a way.

test5 mezzoint shortlines

4.Mezzotint – Strokes

This filter is quite similar to the mezzotint lines, however, I feel there are more areas of flat colour, you only really see the lines where the tones are changing, for instance from black to dark grey, dark grey to light grey, then light grey to white.

Although this filter is less fuzzy than the previous, I still feel it is a bit patchy moving from tone to tone, so it is not the style that I wish to work with, as I would want it to be neater and more refined.

test1

5.Mosaic

Moving away from the mezzotint filters, in the example below, I have shown the Mosaic filter. As you can see, this pixelates the shading, the effect almost reminds me of inappropriate blurring that you would see on tv when the show would blur out product placement, a persons face, a rude hand gesture, or any type of nudity.

Although this filter does give a softer shading, the blockiness is not really a route that I want to take with my designs, so again, I will not be using this filter during this project, but its good to know its there.

test6 mosaic

6.Pointillise

To me, this filter resembles monotone confetti being spilt over my design. I would like to see how this filter works with colour, as it could create some fun designs that I feel would appeal more to children, however it is not something I wish to use within my design.

I feel this filter would be similar to the halftone one, however, where the halftone works in rows of circles, this filter does not have a system, as there are circles overlapping each other, and I feel it works mostly on tones, as opposed to changing the sizes of the circles as I believe the halftone filter does.

test4 pointilise

Although I did not find a filter which had achieved the style that I desired, that being a crosshatch pattern, almost in the style of John Tenniel, as I need a design to use in the screenprinting class, I will choose the best of the results, for me this is the halftone filter, but I will expand the circle size a little, as I do not know how small the new printer for the screenprinting machine can go, and I do want my piece to be readable.


BONUS TIP 

7. Illustrator

When experimenting with the sizes of the circles within the halftone filter, I had formed 3 versions, the first I believe being 10, second I believe is 12 and the third is 14, then I had asked my tutor for advice in which would be most readable, and which would most likely print the best on a screen, in which he had responded the second. I did like the first as it had more of a subtle blend, however, I don’t believe the new printer would have picked up such small detail.

As the original version of this effect was picking up the other tones within this piece, such as the grey tones, I decided to save the image from Photoshop, then take it into Illustrator. In this program, I then ‘image traced’ the image, which had ended up taking away all of the other tones, and had just left me with the black line or dot work. I did this step, as the last time I had screen printed, I recall the design had to be stencil-like, meaning that it could only be one colour, so I did not feel the piece would work correctly if I had left all of the other tones in.

Idea proposals đź’Ť Semester 2

Carrying on from the previous post, for the projects during semester two, I want to…

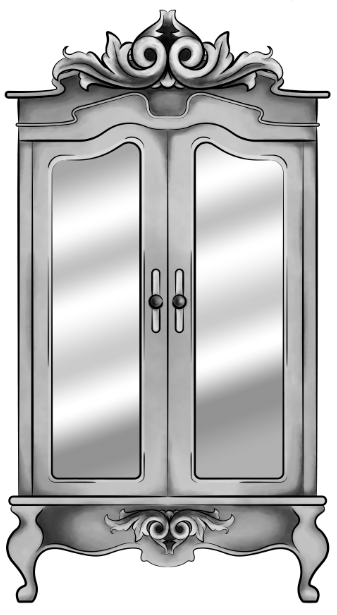
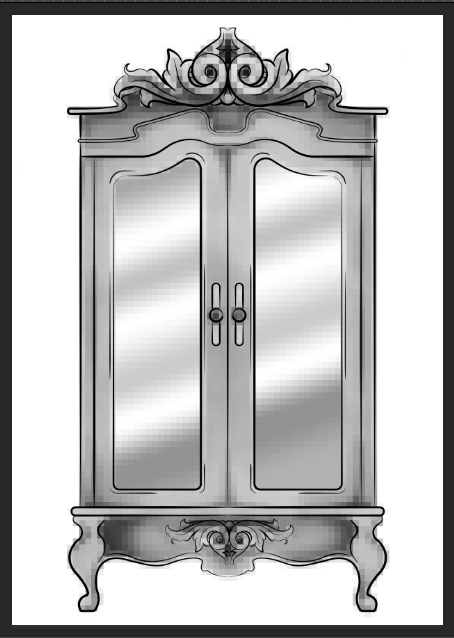
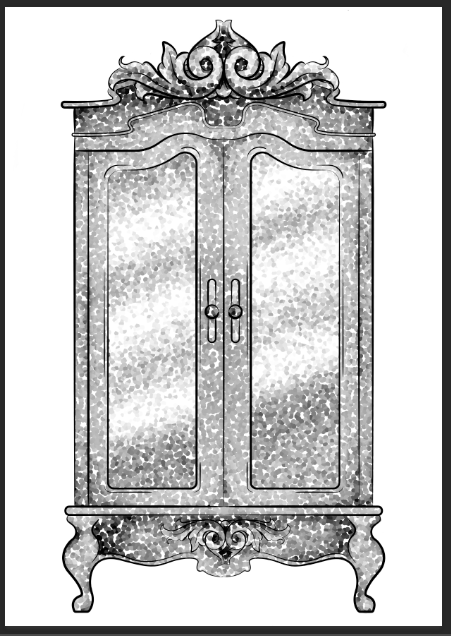
Produce chapter illustrations for ‘The Lion, the Witch and the Wardrobe’.

In this project, like with the Wizard of Oz project I have planned, I want to create work for a younger based audience, which I have not had a lot of experience working within the past. With this project, however, I want to create work for teens as opposed to children, working in what I believe to be more of a mature style, taking inspiration from John Tenniel’s illustrations in the original ‘Alice’s Adventures in Wonderland’ by Lewis Carroll.

As well as giving me more experience of working with a younger audience, (in a different approach to the Wizard of Oz project) I believe this project will allow me to play around and develop my skills with some printing techniques, such as screen printing, Linocut printing, etching, etc, I believe it will allow me to take full advantage of the facilities available to me within the college, such as the laser cutter, to create a plate in which I can print with.


Take part in the Association of Illustrators – World Illustration Awards.

In comparison to the other competitions I want to take part in, this one has multiple categories in which you can apply to. As well as children’s illustration, you also have the option of creating work for an editorial category, advertising, design, etc.

Like with the other projects, I believe the outcomes I create for this brief will help in expanding my portfolio of work throughout the year. At this moment in time, I am swaying more to the editorial category, as I feel it will allow me to work in more areas of the industry. For this category, I would potentially create an illustration for an article, trying to entice the viewer to read the article, but not give too much information so that the reader already feels like they know the story.


Create work for the Cheltenham Illustration Awards.

This is a competition that I will be taking part in for my third year in a row. The brief that they announce will have a specific theme in which I will have to work with, creating a narrative based illustration which will relate to or have been inspired by the specific theme.

In previous years, the themes have been ‘tales through others eyes’ and ‘tangled tales’. I believe the competition is pretty open in the sense that you are not limited to what you can potentially create. For instance, last year I had created my illustration using photography and embroidery, whereas in the year before I had created a surrealistic digital painting and a looped animation.

Because of the flexibility of this competition, being able to explore the theme and work in any possible medium, I am excited to take part again next year, but hopefully next time my work might actually be chosen. If not though, I will still enjoy the experience, and the work I create will still contribute to my portfolio.


The two projects which I want to do over the course of the year are…

Concentrating on branding and start to form a business, preparing for my career once I have left the comforts of college.

This project would include creating new business cards, forming a new set of portfolios, including a handheld a3 one, a website and a new portfolio book, these will also include all of the work that I have created over the year as well.

As of my potential business, I will be creating an online store (potentially in collaboration with one of the graphics students) and for this, I will be creating content that would be sold their, ie prints, pins, clothing, mugs, zines, stickers etc.

In the final month, I also plan to set time aside so that I can get ready for a final show, with this, I will possibly create new content to be put up in the exhibition, and this will also be the time in which I can start to order everything, so that it will come in time for the final show, such as the portfolio book, business cards, and any merchandise that I may have created with outside businesses.


And finally, I want to work on the weekly comics that both me and my partner had created together over the holidays, we named this collaboration Melon and Lime Comics.

Me and my partner have always been interested in mini-comics, most commonly from artists such as Ketnipz, Sarah Andersen and Catana Comics, sending their comics to each other saying ‘this is you’ or ‘me’, and we had even started to come up with our own ideas for potential comics, that we knew we would make someday, but had always kept pushing it off to the side, at least until summer had came. We had not really planned for this collaboration to go further than between the two of us, but one day, we decided to make our own Instagram and try posting the comics on there, to see if anyone else could possibly relate or find humour within our designs.

We have currently got a small following of 40ish people, however, I believe as we post more, our audience will eventually start to grow more. The problem is, as we are back at college, it is going to be more challenging to create content, as we are both going to struggle with time. So, this is why I wanted to incorporate this project into my year, so that I could allow myself the time to work on the comics, without feeling guilty because I am not going ‘college work’.

I do have high hopes for this collaboration as I feel we do have the potential to someday be at the level of the artists we admire, such as Ketnipz, Sarah Anderson and Catana Comics, but I feel it will only do well if we are to put the work and effort into it.  I do love working on these comics because they are personal to my relationship, but I believe the themes are open enough that a lot of other people or couples can also relate to them. This collaboration has also allowed me to expand my work, exploring outside of my comfort zones, such as working with characters, minimalism, creating narratives and I have also been able to incorporate humour into the designs, which is something that I don’t believe I have ever done in my work before, or have even attempted to do before. Because of these developments within my own type of work, I am excited to continue working on these comics, seeing where else they could take me and what else we could potentially create in the future.


As these two last projects will be worked on over the space of the whole year, (I believe on Fridays for the branding project and Tuesdays for the comics) I will be solely keeping the progression, development and any potential research used, all updated within my blog, so you can keep your eyes peeled for those updates in the future.


Bibliography

The Association of Illustrators. (2018). World Illustration Awards. [Online] Available from https://theaoi.com/world-illustration-awards/ [Accessed on 20 Sep. 2018]

Cheltenham Illustration Awards. (2018). Cheltenham Illustration Awards. [Online] Available from: http://www.cheltenham-illustration-awards.com/ [ Accessed on 20 Sep. 2018]